¶ How to fire anything using only brushes
This is based on the following video:
¶ Step 1 - Add Fire:
- Select a brush and change the color to #ff9c00
- Select the Fire 1 Final brush and brush want you want to fire.
- Duplicate the layer and change the mode to vivid light
- Duplicate the layer again change the mode to color dodge
- Select the background layer and add a black solid color under the 3 flame layers.
- Click all 4 layers (3 flame and black background) and convert them to a smart object
- Remove the extra black. Click on Select → Color Range → Sampled Colors and select the black.
- Increase the fuzziness to over 100 (120) and make sure the “INVERT” box is checked and click OK
- Create a layer mask to hide the black color.
- Set the blend mode to Screen
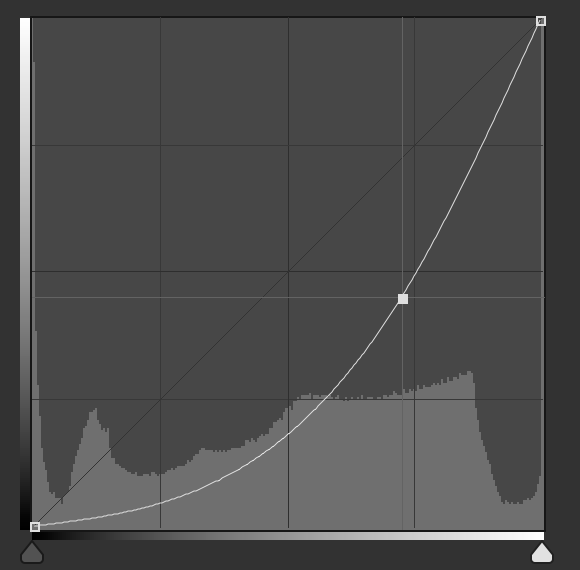
- Create a curves layer
- Add a clipping mask to the fire layer.
- Adjust the curves like this:
¶ Step 2 - Add Smoke and Particles
- Select the brush tool and select a smoke brush.
- Set the size to 450
- set color to black
- Create a new layer below the fire layer.
- Paint over the flames with the smoke brush.
- Create a new layer over the smoke layer
- Select the particles 1 brush
- add particles to the drawing
- Select the smoke an particles layers and group them together and call it “smoke”
¶ Add Glow to fire
- Select the fire and curves layers and group them together.
- Select the fire grout and click CMD+J to duplicate the group and then right click and select “convert to smart object”
- Select filter → Blur → Gaussian Blur and change radius to 450px and click OK
- change Blend Mode to Screen
- Duplicate the Fire Copy layer “CMD+J”. Select the Gaussian Blur of the new copy and set the radius to 300px
- Duplicate the Fire Copy 2 layer “CMD+J”. Select the Gaussian Blur of the new copy and set the radius to 150px
¶ Add Glow to Object
- Select the soft round brush
- Set color #ff9c00
- decrease the brush size to 250
- decrease the opacity and flow to 20%
- Create a new layer
- Color over object
- Set Blend mode to overlay